Showing posts with label In the Kitchen. Show all posts

Tuesday, March 4, 2014

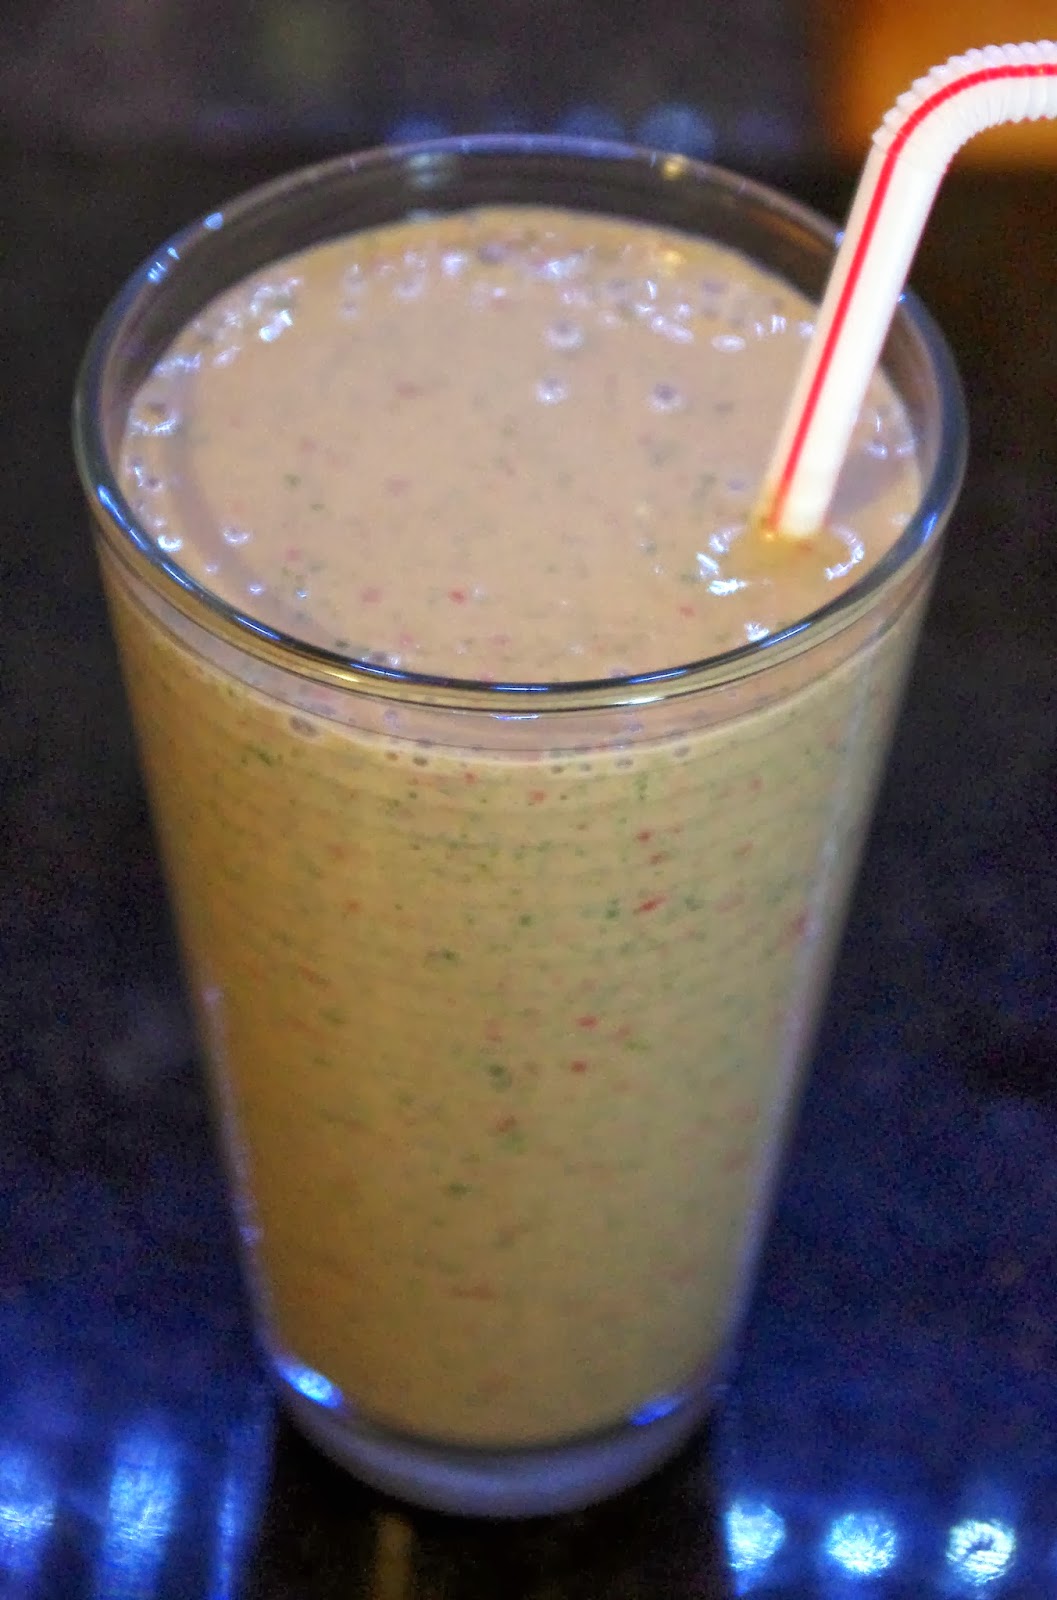
Strawberry Banana Orange Kale Smoothie

I know it's Fat Tuesday. And it is also National Pancake Day. I know I am supposed to be indulging in a stack of hotcakes or a slice of King Cake.

But y'all, I have a food hangover. We celebrated J's birthday last night and ate all of his favorite foods - guacamole and chips; big, fat ribeyes on the grill; twice baked potatoes stuffed with cheese and bacon and sour cream; salad with Italian dressing; and Key Lime pie.

And I just kept eating, even after the point of being stuffed, because everything was just too good (if I do say so myself, since I cooked it all...hehe).

I woke up this morning and I don't know if it was the amount of food I ate, or the red meat, because that never sits well with me and I ate a very large portion of a very large steak. I feel like hammered crap.

So I'm starting Lent a day early, I guess. I was planning to give up "mindless eating" for the season. I'm not cutting out anything in particular, but I am going to be mindful of what I put into my body. Reaching for a candy bar is so much easier than prepping fruit or vegetables for a snack, but it is definitely not the best choice.

If you are in the same boat as me, or if you just want to get more fruits and veggies into your diet, here's a quick smoothie recipe.

Into your blender goes the following:


1 large Kale leaf, washed and torn into small pieces (discard the stem)
1/2 Banana, frozen
3/4 Cups Strawberries, chopped
1/2 Cup Plain Greek Yogurt
1/2 Cup Orange Juice
1/2 tsp. Vanilla

For smoothies, I like to take fresh bananas and smash the crap out of them, then freeze them in little hockey pucks. This makes them super easy to store in the freezer (they are flat!) and easy to use, plus it adds some creaminess to your smoothie.

Blend all ingredients until they become a smoothie. Drink and feel good about what you are putting into your body.

Monday, March 3, 2014

Baking By Request: Marbled Cheesecake Brownies


I wanted to bake something yesterday, but I wasn't sure what to make. I put an all call out on The Facebook and got a lot of different responses: muffins, cake, enchiladas, King Cake, Creme Brulee, peach cobbler, cheese wafers, cream puffs, one request to "bake a pie", and then, my bestest friend suggested Cheesecake Brownies. I later found out that she was craving them because they have them at Starbucks and she saw them and wanted one, but was trying to be good, so she didn't buy one. That didn't mean she didn't want to eat one, though. And when you know that your best friend has been working really hard to eat healthy and hasn't been treating herself at all over the past few weeks, well, you would be a terrible person if you didn't bake something for her when she asks.

Smitten Kitchen is one of my go-to blogs for dessert recipes, so I started there, since I've never made Cheesecake Brownies before. And the recipe she has did not disappoint. I had to make a few minor adjustments to her version - I was planning to bake a 9 x 13 pan of brownies and her recipe was designed for an 8 x 8 pan, so I made a 1 1/2 batch of the brownie batter, but kept the cheesecake batter recipe the same, since I didn't want the chocolate flavor to get lost.

Also, I only had 3 ounces of unsweetened chocolate, and needed 4 1/2 ounces for the batter. I adjusted this by adding a tablespoon of cocoa powder and taste tested the batter to make sure the chocolate flavor was there - and it was! It really was!


Brownie Batter:
1 1/2 Sticks Unsalted Butter
3 Oz. Unsweetened Chocolate
1 1/2 Cup Sugar
3 Eggs
3/4 tsp. Vanilla
1 Cup Flour
1 Tbsp. Cocoa Powder


Cheesecake Batter:
8 Oz. Cream Cheese, softened
1/3 Cup Sugar
1 Large Egg Yolk
1/4 tsp. Vanilla

Optional Additions: 1/2 Cup Chocolate Chips, 1/2 Cups Chopped Nuts (I went with the chocolate chips and I'm glad I did!)

Preheat oven to 350 degrees. Butter (and this is important - use butter, not baking spray, because, well, butter is just better) a 9 x 13 baking dish.

Prepare the Brownie Batter - Melt the butter and chocolate in a double-boiler. Do this in your mixing bowl and it saves you from having to wash one. more. dish. Whisk in the sugar, eggs, vanilla, flour, and cocoa powder. Do not overmix, whisk until just combined. Pour this into the prepared baking dish and spread evenly.

Prepare the Cheesecake Batter - Using an electric mixer, or your arm and a whisk if it's Arm Day, combine all ingredients in a medium size bowl. Whip until it is smooth and creamy.

Dollop the Cheesecake Batter all over top of the brownie batter.


Take a butter knife and swirl the mixture all around, creating a beautiful, tasty, marbled effect. If adding, sprinkle the chocolate chips or nuts over the top of the brownies and press down a little, to make sure they bake into the batter.


Bake for 30 - 40 minutes. You want the edges to be slightly puffy and the Cheesecake Batter to be almost fully set.


Let the brownies cool slightly (for about 10 minutes) before you take a fork to them. Oh, that's just me, huh? Well, let them cool before you slice them into pretty little squares. They will slice easier if they are completely cool.

Monday, December 23, 2013

Green Gables Cooking: Chocolate Caramels

I am reading the Anne series by L. M. Montgomery again for the nine-hundred and fifty-fourth time, give or take. :) One thing that has always fascinated me about this series is the frequent mention of what they are eating.

I remember the first time I read Anne of Green Gables and they talked about eating chicken salad as if it were a delicacy. This made no sense to me. Chicken salad was available at practically every restaurant I visited. Why would this be a "special occasion" food? I didn't understand that in order to eat chicken salad, you had to kill a chicken, pluck it, roast it, let it cool, and then make it into a salad. That's a lot of work to go through for something like chicken salad, although I admit, it is one of my favorite foods.

I've decided that this time, as I read through each book, I'm going to take note of all of the foods mentioned and see if I can find recipes from the late 1800s and early 1900s for them. Then, I'll make the recipes and post them here. I know other people have attempted this - I'm not breaking new ground here - but it should be fun. I found this delightful little website, which has an extensive list of the foods from the books, but the recipes are not all authentic to the time period. I am going to try to avoid any recipes that have modern ingredients and use methods of cooking that are more similar to those times, but I don't have access to a wood burning stove, so my glass top electric will have to do. :)

I do want to note that the first food mentioned in Anne of Green Gables is crab apple preserves. Although I love making jellies and jams, I try to do this in season, based on what foods are available at my friends' farms. I will be skipping the preserves and jams for now, but may throw one in if the produce becomes available.

OK. Here we go.

The first recipe from Green Gables I have decided to attempt is for Chocolate Caramels. Anne mentions these as she explains that when she is in "the depths of despair" she isn't able to eat anything, "...not even if it was a chocolate caramel. I had one chocolate caramel once two years ago and it was simply delicious. I've often dreamed since then that I had a lot of chocolate caramels, but I always wake up just when I'm going to eat them." (AOGG, pg. 26)

I searched for Chocolate Caramel recipes from the 1870s, since that is when Anne comes to stay at Green Gables. After a little bit of digging, I found the following recipe from the Public Ledger Almanac for 1870 - 1873. (I've rewritten it in a more familiar format below.)
CHOCOLATE CARAMELS - Take one cup of sugar, one cup of molasses, a piece of butter the size of an egg, one cup of cream or milk, and two ounces of grated, unsweetened chocolate. Put these ingredients in an enameled saucepan, and boil them together, stirring constantly for twenty minutes. Then try them by dropping a little of the mixture into a cupful of cold water; when it is sufficiently cooked it will form into a ball in the water. Then remove from the fire and beat well until beginning to cool. Flavor with half a teaspoonful of essence of vanilla, and pour into buttered tins to the depth of half an inch. Before the caramels have hardened, mark them into small even squares with a knife.
To figure out how much butter is the equivalent to "the size of an egg," I used logic.

4 Tablespoons should do it.

Chocolate Caramels


Ingredients:
  • 1 Cup Sugar
  • 1 Cup Molasses
  • 4 Tbsp. Unsalted Butter
  • 1 Cup Cream or Whole Milk
  • 2 Ounces Unsweetened Chocolate, grated
  • 1/2 tsp. Vanilla Extract
In a saucepan combine the first 5 ingredients. Bring to a boil. Continue to boil the mixture for 20 - 25 minutes, stirring constantly with a wooden spoon to prevent sticking.

Remove the mixture from the heat when it reaches 240 degrees F (soft ball stage).

Stir and stir and stir until the temp comes down to around 120 degrees F and then add the vanilla.

Pour the mixture into a buttered 8 x 8 glass baking dish. Allow to sit for 15 minutes and then cut into squares. You can also roll the caramel into small balls and flatten with the bottom of a glass on a Silpat or parchment paper.

This recipes makes A LOT of candy. I didn't count how many pieces I ended up with, but it was a full Silpat.


Oh, and, this candy gets hard. It reminds me of a chocolate Werther's. Super tasty!

My first "authentic" Anne recipe turned out to be quite the success!

"I'll just eat one tonight, Marilla. And I can give Diana half of them, can't I? The other half will taste twice as sweet to me if I give some to her. It's delightful to think I have something to give her." - Anne Shirley (AOGG, pg. 89)

Friday, October 25, 2013

Chicken Soup for the Body and Soul

Chicken Soup. It is known throughout the world for its healing powers. Tummy troubles, a touch of the flu, a broken arm, or just a really bad day - all ailments that can be cured with a steamy bowl of chicken-y, vegetable-y broth. If you are stuck in bed, add some Club crackers or Saltines, and an episode of I Love Lucy or The Dick Van Dyke Show. If you are up to eating at the table, add a crusty loaf of French bread and some homemade butter on the side, maybe a glass of red wine, if you are feeling indulgent.

I have a pot of soup on the stove now. I was inspired to make it because the weather is chilly and it just seems like the perfect fall day to eat chicken soup on the porch for dinner, bundled up in a scarf and hat, getting warmed up from the inside out. And yes, I realize that to most of my family, the New Yorkers and New Hampshirites, the Wisconsinites and Iowans and Nebraskans, 58 degrees is not scarf and hat worthy weather for you. But it goes from blazing hot summer to frosty cold winter around here, and my skin is just not thick enough to handle anything colder than 68 degrees without some sort of jacket or coverup.

Everyone seems to have their own recipe for chicken soup. They make it how their mom, or their mom's mom, or their great-grandad made it and that is the absolute, only, authentic way to make it. My recipe is not an old family recipe, it is just a simple technique. And in the case of foods like chicken soup, I think simple is always better.

The plus side to cooking something simple is that I can multi-task while I cook. And I don't mean send texts, or get something else crossed off my ever expanding to do list. I mean I can pray while I cook.

Do you pray over your food? I don't mean the right-before-you-eat, "God is great, God is good, let us thank Him for our food" type of praying, I mean while you are cooking. I've started doing this recently and I think it makes a difference in the end product.

Here is how it went today while I got the soup ready to go.

Olive oil in the pot, then sliced onions and garlic. Bless the people who are going to eat this soup.

Let cook until fragrant, then add some water. Allow this soup to bring them comfort.

Half-moon carrots and diagonally-sliced celery go in next. Let the nutrients from these vegetables be what their body needs to feel better.

Then come the chicken thighs. Let the protein from this chicken give them strength.

Cover with water and bring to a boil, then add salt, ground pepper, oregano, basil, and fresh rosemary. Bring them peace.

Reduce to a simmer and let cook for 1 to 2 hours, until the chicken pulls off the bone and the vegetables are cooked through. Thank you, Lord, for all you have already done in our lives, all your are doing, and all you will do.


Amen.

Saturday, October 19, 2013

Sausage Cheese Dip

This seems like a silly recipe to even post, because it is so simple and made with stuff I already had in my fridge and pantry. It comes together in about 10 minutes. The thing is, maybe that's why it IS a good recipe to post - because you probably have all of this at your house and maybe you need something to feed a crowd of people who are coming over to watch football, or play Cards Against Humanity, or maybe even sing a few worship songs.

Anyway, so, here it is. The easiest recipe you will read today.


Sausage Cheese Dip

  • 16 oz. Pork Sausage (Breakfast Sausage)
  • 8 oz. Monterey Jack Cheese, grated
  • 8 oz. Cream Cheese, softened
  • 1 Can Diced Tomatoes, drained (15 oz.)
  • Black Pepper
  • Oregano
  • Garlic Powder

Brown the sausage. Drain the excess fat. Put sausage in a large bowl.

Add grated cheese and mix until it melts a little bit. Add the cream cheese and smoosh it all together. Add the tomatoes and spices (just sprinkle some on - I never measure spices in stuff like this) and mix until combined.

Serve warm with Ritz crackers, saltines, tortilla chip scoops, or a spoon.

I think this would be equally as good made with ground turkey and a different kind of cheese. Do what you want. Make it your own. Or don't, follow this exactly, and you will be happy and full.

Monday, September 30, 2013

Back In The Kitchen

I don't have any real recipes to share today. I did make some pretty good things in the kitchen, though.

I started with Pickle Things: Deconstructed. Softened cream cheese, chopped up sliced honey ham, and diced dill pickles. I used our homemade pickles and added a little pickle juice to thin it out a bit.


The dish above is now empty, so I think that tells you how good it was. A special thanks to Jehremie's cousin Amber for suggesting this! So simple and so freaking delicious!

I made a salad for dinner. Halved cherry tomatoes, thinly sliced carrots, celery, and cucumbers, and sliced green onions marinated in olive oil, apple cider vinegar, lemon juice, mustard, parsley, garlic powder, salt and pepper.


I poured the veggie mixture over chopped Romaine lettuce and added some crumbled baked bacon. It was light tasting, but very filling.

I also baked bread today. One large loaf and two small round loaves.


I'm thinking about taking one of the round loaves to a luncheon on Wednesday, since we are having a soup potluck.

Monday, September 9, 2013

MSABC Fundraiser: My Paint Party

This is my second year as a member of Making Strides Against Breast Cancer Team Grandmama's Girls. Last year, we did an assortment of different fundraisers, including a Premier Jewelry Party, a yard sale, a musical cabaret, and a paint party with Tana of My Paint Party.

Out of all of the ways we raised funds, the paint party was the most enjoyable. So much so that we decided to do it again this year.

The other girls on the team were nice enough to let me cater the event. I am considering this my first official catering job and I think it turned out pretty darn good!

This was the full spread, before all of us hungry women attacked it!

We started the day out with a mustache picture - It's not really a party unless everyone is wearing a mustache!

Cucumber Sandwiches with Whipped Dill Cream Cheese.

The cutest little BLTs you've ever seen!

Veggie Shooters with Homemade Ranch Dressing.

Rainbow Fruit Skewers.


Checkerboard Cake. There are no pictures of the inside of the cake, because when we cut into it, it kind of fell apart. This was my first time attempting this cake and I know what I will do differently next time. Lesson learned!

My mom brought these desserts and they were just delicious!

All of the paintings turned out great!

Mom and me with our paintings! Such a fun day!

We raised around $250 for Making Strides with this party - not too shabby!!

Tuesday, August 20, 2013

And Just Where Have You Been, Young Lady?

So, I kind of just realized that I haven't blogged in 20 days. Um, whoops. So, what have I been up to? Let me show you.


Love, Loss and What I Wore is a play by Nora and Delia Ephron. We will be performing this as a benefit show for Making Strides Against Breast Cancer on September 27, 28 and 29 at Kaleidoscope Theatre. I am so excited about getting to work with the cast and getting back on stage again.


Fred and Ethel have been with us for a few weeks and seem to be settling in nicely. They are domestic ducks, but we think they have a little Peking in them. They are for playing, not for eating. :-) Bonus points to them for eating all of the bugs in our yard!


The cats and I have done some photo shoots to make the rainy days pass a little quicker.


And we have been eating really, really good lately!


On top of all the other things, my morning routine has changed a bit. This is pretty much what it looks like once I crawl out of bed and make a pot of coffee. It has made a world of difference to start my day with The Word. I'm also really enjoying putting pen to paper.

So, yeah...that's about it. I mean, there have been some other adventures, but I either didn't have my camera or I want to wait and share them in a separate post.

Now that I'm back, I promise not to go away for so long again. I know your world just hasn't been the same in the past 20 days, but have no fear - Flirt D. Lee is here. :-)

Wednesday, July 31, 2013

Boring Grocery Shopping Post for August

I am using this post as a way to keep track of what I buy and what I make out of those groceries. I will not be insulted if you skip right past this, since it is about as exciting as shopping at Wal-Mart. OK, there aren't as many bad life choices being made, but you get the idea.

I spent around $180 on the following groceries.

Produce:

  • Celery
  • Carrots
  • Russet Potatoes
  • Yellow Onions
  • Pink Lady Apples
  • Peaches
  • Lemons
  • Lemon Juice
  • Lime Juice
Meat / Fish:
  • Ground Beef
  • Ground Turkey
  • Chicken Thighs
  • Chicken Leg Quarters
  • Pork Shoulder Picnic Roast
  • Italian Sausage
  • Bacon
  • Ground Sausage
  • Salmon
  • Shrimp
Dairy:
  • Colby Jack Cheese
  • Parmesan Cheese
  • Mozzarella Cheese
  • Sour Cream
  • Butter
  • Vanilla Greek Yogurt
  • Milk
  • Eggs
  • Unsalted Butter
  • Crescent Rolls
  • OJ Concentrate
Canned / Other:
  • Flour Tortillas
  • Hickory Smoked Spam (don't judge)
  • Tortilla Chips
  • Diced Tomatoes
  • Whole Tomatoes
  • Tomato Sauce
  • Tomato Paste
  • Sliced Pineapple
  • Sweetened Condensed Milk
  • Sugar
  • All-Purpose Flour
I am going to try to make these groceries, plus the things that are already in our pantry, last for a month. I know this is doable, we will just have to pay attention to the portions we are eating. And I fully expect to buy milk and eggs about halfway through the month. Other than that, I see a lot of "trasheroles" and "trash pizzas" in our future.

Thursday, July 25, 2013

Breakfast for Lunch: Dutch Baby Pancake

For the first few weeks after I was fired, I did a really good job of getting out of bed at a reasonable time and getting out of my pajamas before noon. This week, though, we have been staying up late every night, which is making my wake up time later and later every day.

I actually crawled out of bed around 9:00 this morning, but I couldn't get motivated to get anything done. Instead, I caught up on blogs that I love and that's when I saw this recipe for Dutch Baby Pancakes over on Cup of Jo. Looked like lunch to me.

I have never made a Dutch Baby before, but I will be honest here and now and say that pancakes are one of my favorite things to eat and one of my least favorite things to make. I don't know if it is the temperature of the pan or the amount of butter I use in the pan or the length of time I mix the pancake batter for, but I am rarely successful when it comes to making a stack. This is why the Dutch Baby is so very appealing - it's all the flavor of a pancake with none of the fussiness of the flipping.


Dutch Baby Pancake

Ingredients:
  • 3 Tbsp. unsalted butter
  • 2 Eggs
  • 1/2 Cup Whole Milk
  • 1/2 Cup All-Purpose Flour
  • 1/2 tsp. Vanilla Extract
  • 1/2 tsp. Ground Cinnamon
  • 2 tsp. Sugar
  • A pinch of Salt
Place a 10-inch cast iron skillet on the middle rack of your oven, then heat it to 425 degrees.

Melt the butter in a saucepan over medium heat. Be sure to stir CONSTANTLY or the bottom of your pan will be wrecked and take some elbow grease to clean. Not that I speak from experience or anything. :-) Allow the butter to cook until it turns a caramel color and gives off a nutty smell. Take a moment to enjoy that aroma - there is not much better than the smell of browned butter. Set the pan aside.

In a medium bowl, combine all ingredients except the butter. Once they are just combined, add 1 Tbsp. of the melted butter and mix well.

Remove the skillet from the oven and add the remaining melted butter. Swirl it around so it coats the bottom and the sides, about halfway up the pan. Slowly pour the batter into the skillet.

Return the skillet to the oven and bake for 15 - 20 minutes. The middle of the Baby will delightfully puff up and it will look like you are baking a sombrero. This is the desired result. It's ok, you're doing it right! 

Yield: 6-ish servings (but we each at about a 1/3 of the thing, so really 3 servings if you are hungry. Or 1 serving if you are feeling selfish, which is ok sometimes, really!)


Cup of Jo's recipe has a lovely pear topping to go along with it, but we are fresh out of pears at Casa de Woods. So, we improvised a little. Some of us topped it with butter and maple syrup, some of us used strawberry-fig jam, and some of us decided that this was the perfect opportunity to make a PB&J out of a pancake. Yummy all around and the pan was empty at the end of lunch.


I think it would be fun to do a savory version of this and maybe top it with goat cheese and tomatoes. Maybe tomorrow...

Sunday, July 21, 2013

Leftover Makeover: Mashed Potato Pancakes

Generally speaking, mashed potatoes only make an appearance at our house on holidays. Thanksgiving, Christmas, New Years. Sometimes, they show up when we are having people over, but most of the time, I ask my mom to make them for gatherings. She just has a knack with the mashing and the flavoring that I haven't mastered.

My brother is in town for the week and we all hung out at Mom's house last night. And because she is The Best Mom In The History Of Moms, she made us mashed potatoes. One thing she always does is make enough so there are leftovers.

She was nice enough to send some home with us, so I decided to turn them into Mashed Potato Pancakes for lunch today.

This is seriously one of the easiest recipes to throw together, and the nice thing is, if you have company, they make a lovely addition to breakfast or brunch or dinner or lunch. The other nice thing is that you can make these with lots of different flavor additions - change the type of cheese, change the spices, and you can completely customize your pancakes. That's my favorite part of cooking: making it my own.


Ingredients:
  • 2 Cups Mashed Potatoes
  • 1 Egg, beaten
  • 1/2 Cup Mozzarella, shredded
  • 3 Tbsp. Cream Cheese, softened
  • 1 Tbsp. Fresh Chives, chopped
  • Salt and Pepper, to taste
  • 2 Tbsp. Olive Oil
In a medium size bowl, combine all ingredients except olive oil. Heat the oil in a skillet over medium heat.

Drop potato mixture by the spoonful into the heated skillet. Smoosh down with your fingers to flatten into pancakes.

Cook pancakes until browned, for about 3 to 4 minutes on each side.

Yield: 6 2" pancakes

You can serve these by themselves, or with sour cream and chives, or with a fried egg on top. The possibilities are endless.

Thursday, July 11, 2013

Stuffed Baked Tomatoes

This isn't really a recipe, as much as it is a "Hey, you should try this!" idea. I made Baked Shrimp and Grits a few nights ago. The recipe made a 9x13 pan of cheese grits, which is a lot, even for a transplanted Southern girl like me.

I decided that instead of just heating up the grits and enjoying their cheesy goodness, I should turn them into something even better. And this...this, my friends, is the way to go.


Basically, you take some cheese grits (mine already had a lot of spices added, including Louisiana Hot Sauce) and mix in some green onions, plus a little more black pepper and garlic. Then, you hollow out some tomatoes - bonus points if they are homegrown, because that just adds to the awesomeness of the dish. Mix the tomato guts with the grits mixture.

Stuff those pretty red guys with the cheesy grits mixture and bake them in a 350 degree oven for about 30 minutes. The grits get all melty and the tomato flavor becomes intensified. You could probably sprinkle some cheddar cheese on top toward the end of the baking time, if you wanted to go a little nuts. I am adding this to my regular rotation of recipes to impress guests, because they look fancy, but are so easy to make.

Friday, July 5, 2013

Dehydrator Madness: Dried Cantaloupe

I have been so blessed this summer with fruit and vegetables from local farms that have an overabundance that they just can't sell. Blueberries, grapes, cucumbers, watermelon and cantaloupe.


I hate to see food go to waste, especially when the food is as ripe and sweet as these cantaloupes were. I turned one of them into popsicles (are you noticing a trend?), but wasn't sure what to do with the second.
 
 
Enter the Food Dehydrator.
 
Dried Cantaloupe? Would it work? Would it just shrivel up and be totally gross? It was worth giving it a try. I sliced the melon into 1/4" thick slices and placed them on the dehydrator trays.


I set the dehydrator at 135 degrees and let it go for 8 hours. The result?


It is very similar to dried mango, but with a slightly earthier flavor. It would make an excellent addition to trail mix, and also to the Hurricane Kit, but to be honest, I haven't eaten much of it on its own. This is one of those foods that I could see making again if I had too many cantaloupes and no desire to eat them right away.


Wednesday, July 3, 2013

Cucumber Lime Mint Popsicles

It is officially summertime. You can tell, because every single day this week, it has rained. And not just rained, but dumped buckets on our yard. This generally lasts for about 10 minutes and then, back to that famous Florida sunshine. That's the thing about Florida in the summertime - if you don't like the weather, just wait 10 minutes and it will change.

In addition to the daily rainstorms, it has also been hot. Sweltering is probably a better way to describe it, actually. Temperatures in the 90s, sometimes breaking 100, are not unusual, but combined with the humidity, it makes for a steamy atmosphere. Steamy, not in a sexy way, but in a shirt stuck to your back, hair the size of a Texas beauty queen, kind of way.

When it gets like this, there is only one thing to do: Make popsicles. I've gone through a popsicle making phase over the past few weeks, combining mostly traditional ingredients like fruit, yogurt, and simple syrup, but I wanted something different.


Cucumber Water has always been something that in my head, I know I love, but I never actually make it at home. We had an over abundance of cucumbers, thanks to a farmer friend with a bumper crop. With those cucumbers, we made pickles until the entire house, and my skin, smelled like pickle juice for days. I infused some vodka with cucumbers. And of course, we ate cucumbers sprinkled with sea salt and pepper for lunch and dinner, and sometimes breakfast.

In the haze of the heat, I became obsessed with the idea of making popsicles out of cucumbers. The idea to just shove a stick up the end of a peeled cucumber and pop it into the freezer might have crossed my mind, but I wanted other flavors in there, too. I know that Cucumber Mint salad can be simply heavenly, and I know that when you combine mint and lime, you basically get a Mojito. So I put all three into a blender and the result: refreshing, light, crisp. Lovely.


Cucumber Mint Lime Popsicles
Ingredients:
  • 2 Cup diced cucumber (approx. 3 small cucumbers, that have been peeled and seeded)
  • 2 Tbsp. fresh lime juice (one medium lime)
  • 3/4 Cup Mint Syrup - recipe below
Place all ingredients in to a blender. Puree until smooth. Pour into popsicle molds. Let freeze for 1 hour, then insert popsicle sticks. Continue to freeze for an additional 3 - 4 hours.

Yield: 6 Popsicles

Mint Syrup
Ingredients:
  • 1 Cup Water
  • 1/2 Cup Sugar
  • 1 Tbsp. fresh Mint Leaves, roughly chopped
Combine water and sugar in a saucepan. Heat over medium heat, until sugar dissolves. Add chopped mint leaves and bring to a boil. Boil for 1 minute. Set aside to cool.


Before adding syrup to the blender, strain to remove mint leaves.

Tuesday, June 25, 2013

Blueberry Yogurt Pops

Three ingredients, one blender, 6 popsicle molds, and a freezer. That's all it takes to make these and they are so refreshing and light, especially on a hot Florida summer day.


Ingredients:
  • 2 Cups Plain Greek Yogurt
  • 1 Cup Blueberries (fresh or frozen)
  • 2 Tbsp. Honey
Place all ingredients in a blender and puree. I used the "Smoothie" button on my blender and it blended perfectly.


Pour into popsicle molds. Let freeze for about an hour and then insert popsicle sticks (or in my case, lollipop sticks) into each popsicle. Continue to freeze until firm, for about 4 - 6 hours.

Yield: 6 - 8 popsicles.