Wednesday, July 31, 2013

Boring Grocery Shopping Post for August

I am using this post as a way to keep track of what I buy and what I make out of those groceries. I will not be insulted if you skip right past this, since it is about as exciting as shopping at Wal-Mart. OK, there aren't as many bad life choices being made, but you get the idea.

I spent around $180 on the following groceries.

Produce:

  • Celery
  • Carrots
  • Russet Potatoes
  • Yellow Onions
  • Pink Lady Apples
  • Peaches
  • Lemons
  • Lemon Juice
  • Lime Juice
Meat / Fish:
  • Ground Beef
  • Ground Turkey
  • Chicken Thighs
  • Chicken Leg Quarters
  • Pork Shoulder Picnic Roast
  • Italian Sausage
  • Bacon
  • Ground Sausage
  • Salmon
  • Shrimp
Dairy:
  • Colby Jack Cheese
  • Parmesan Cheese
  • Mozzarella Cheese
  • Sour Cream
  • Butter
  • Vanilla Greek Yogurt
  • Milk
  • Eggs
  • Unsalted Butter
  • Crescent Rolls
  • OJ Concentrate
Canned / Other:
  • Flour Tortillas
  • Hickory Smoked Spam (don't judge)
  • Tortilla Chips
  • Diced Tomatoes
  • Whole Tomatoes
  • Tomato Sauce
  • Tomato Paste
  • Sliced Pineapple
  • Sweetened Condensed Milk
  • Sugar
  • All-Purpose Flour
I am going to try to make these groceries, plus the things that are already in our pantry, last for a month. I know this is doable, we will just have to pay attention to the portions we are eating. And I fully expect to buy milk and eggs about halfway through the month. Other than that, I see a lot of "trasheroles" and "trash pizzas" in our future.

Thursday, July 25, 2013

Breakfast for Lunch: Dutch Baby Pancake

For the first few weeks after I was fired, I did a really good job of getting out of bed at a reasonable time and getting out of my pajamas before noon. This week, though, we have been staying up late every night, which is making my wake up time later and later every day.

I actually crawled out of bed around 9:00 this morning, but I couldn't get motivated to get anything done. Instead, I caught up on blogs that I love and that's when I saw this recipe for Dutch Baby Pancakes over on Cup of Jo. Looked like lunch to me.

I have never made a Dutch Baby before, but I will be honest here and now and say that pancakes are one of my favorite things to eat and one of my least favorite things to make. I don't know if it is the temperature of the pan or the amount of butter I use in the pan or the length of time I mix the pancake batter for, but I am rarely successful when it comes to making a stack. This is why the Dutch Baby is so very appealing - it's all the flavor of a pancake with none of the fussiness of the flipping.


Dutch Baby Pancake

Ingredients:
  • 3 Tbsp. unsalted butter
  • 2 Eggs
  • 1/2 Cup Whole Milk
  • 1/2 Cup All-Purpose Flour
  • 1/2 tsp. Vanilla Extract
  • 1/2 tsp. Ground Cinnamon
  • 2 tsp. Sugar
  • A pinch of Salt
Place a 10-inch cast iron skillet on the middle rack of your oven, then heat it to 425 degrees.

Melt the butter in a saucepan over medium heat. Be sure to stir CONSTANTLY or the bottom of your pan will be wrecked and take some elbow grease to clean. Not that I speak from experience or anything. :-) Allow the butter to cook until it turns a caramel color and gives off a nutty smell. Take a moment to enjoy that aroma - there is not much better than the smell of browned butter. Set the pan aside.

In a medium bowl, combine all ingredients except the butter. Once they are just combined, add 1 Tbsp. of the melted butter and mix well.

Remove the skillet from the oven and add the remaining melted butter. Swirl it around so it coats the bottom and the sides, about halfway up the pan. Slowly pour the batter into the skillet.

Return the skillet to the oven and bake for 15 - 20 minutes. The middle of the Baby will delightfully puff up and it will look like you are baking a sombrero. This is the desired result. It's ok, you're doing it right! 

Yield: 6-ish servings (but we each at about a 1/3 of the thing, so really 3 servings if you are hungry. Or 1 serving if you are feeling selfish, which is ok sometimes, really!)


Cup of Jo's recipe has a lovely pear topping to go along with it, but we are fresh out of pears at Casa de Woods. So, we improvised a little. Some of us topped it with butter and maple syrup, some of us used strawberry-fig jam, and some of us decided that this was the perfect opportunity to make a PB&J out of a pancake. Yummy all around and the pan was empty at the end of lunch.


I think it would be fun to do a savory version of this and maybe top it with goat cheese and tomatoes. Maybe tomorrow...

Tuesday, July 23, 2013

DIY: Powdered Dishwasher Soap

Since I already had most of the ingredients on hand from the laundry soap, I decided to see if homemade dishwasher soap would be worth it and if it would clean as well as the liquid kind I usually buy. I found the recipe through Pinterest on this blog.


  • 1 Cup (6.2 ounces) of Borax (Cost = $0.25)
  • 1 Cup (8.8 ounces) of Arm & Hammer Super Washing Soda (Cost = $0.53)
  • 1 Cup (6.2 ounces) of LemiShine (Cost = $1.92)
  • 1/2 Cup (3.9 ounces) of Coarse Kosher Salt (Cost = $0.20)
All of the above ingredients are available at Wal-Mart. The LemiShine is with the dishwashing products. 

Combine all ingredients in a bowl. Gotta love simple!


The above recipe makes 25.1 ounces of soap. It fits in a quart size canning jar. The total cost for the batch of soap is $2.90. You only need about a 1/2 ounce for one load of dishes, so the cost per load comes out to $0.06. The price for Cascade Powdered Dishwasher Soap at Wal-Mart is $3.97 for a 45 ounce box. For comparison's sake, let's say you use 1/2 an ounce of it to do a load of dishes - this comes out to a cost of around $0.05 per load.

So, will making your dishwasher soap save you any money? It doesn't appear so. What it does do is make you more aware of what is going into your water supply. The less chemicals the better, I say.

It cleans just as well as the commercial soap. I have read suggestions of adding vinegar to the pre-treatment compartment, to help with spots, but we aren't that concerned about our fine china being spotty. :-)

One note about this soap: it does tend to clump. I would recommend putting a Dessicant packet in the jar before you store it. 

Monday, July 22, 2013

Hurricane: The Board Game


Is it wise to play a game called "Hurricane: The Game of the Tropics" in Florida smack in the middle of hurricane season? I think it would only really be tempting fate if it was played while a hurricane was bearing down on the Gulf Coast, but even then, it might have to come out and be a part of the party.

If you are interested, a little information about the origins of this board game can be found here. I'm not sure I believe that this game was an "immediate hit" or that it "(sold out) in stores from the Gulf Coast to New England." If it did, I'm guessing people got it home, read the directions and went, "Huh?" Just look at this picture of Michael and Mom, taken while Murphy read the directions to us:


We had to reference the directions multiple times while we played this take on Monopoly, where instead of railroads and Park Place, you can buy resorts that are in classically hurricane-prone zones of the tropics.

Murphy was the Master of the Game, since he is the one with the best reading comprehension skills in our group.


That thumbs up was given WAY before we realized just how boring this game would be if we followed the actual directions.

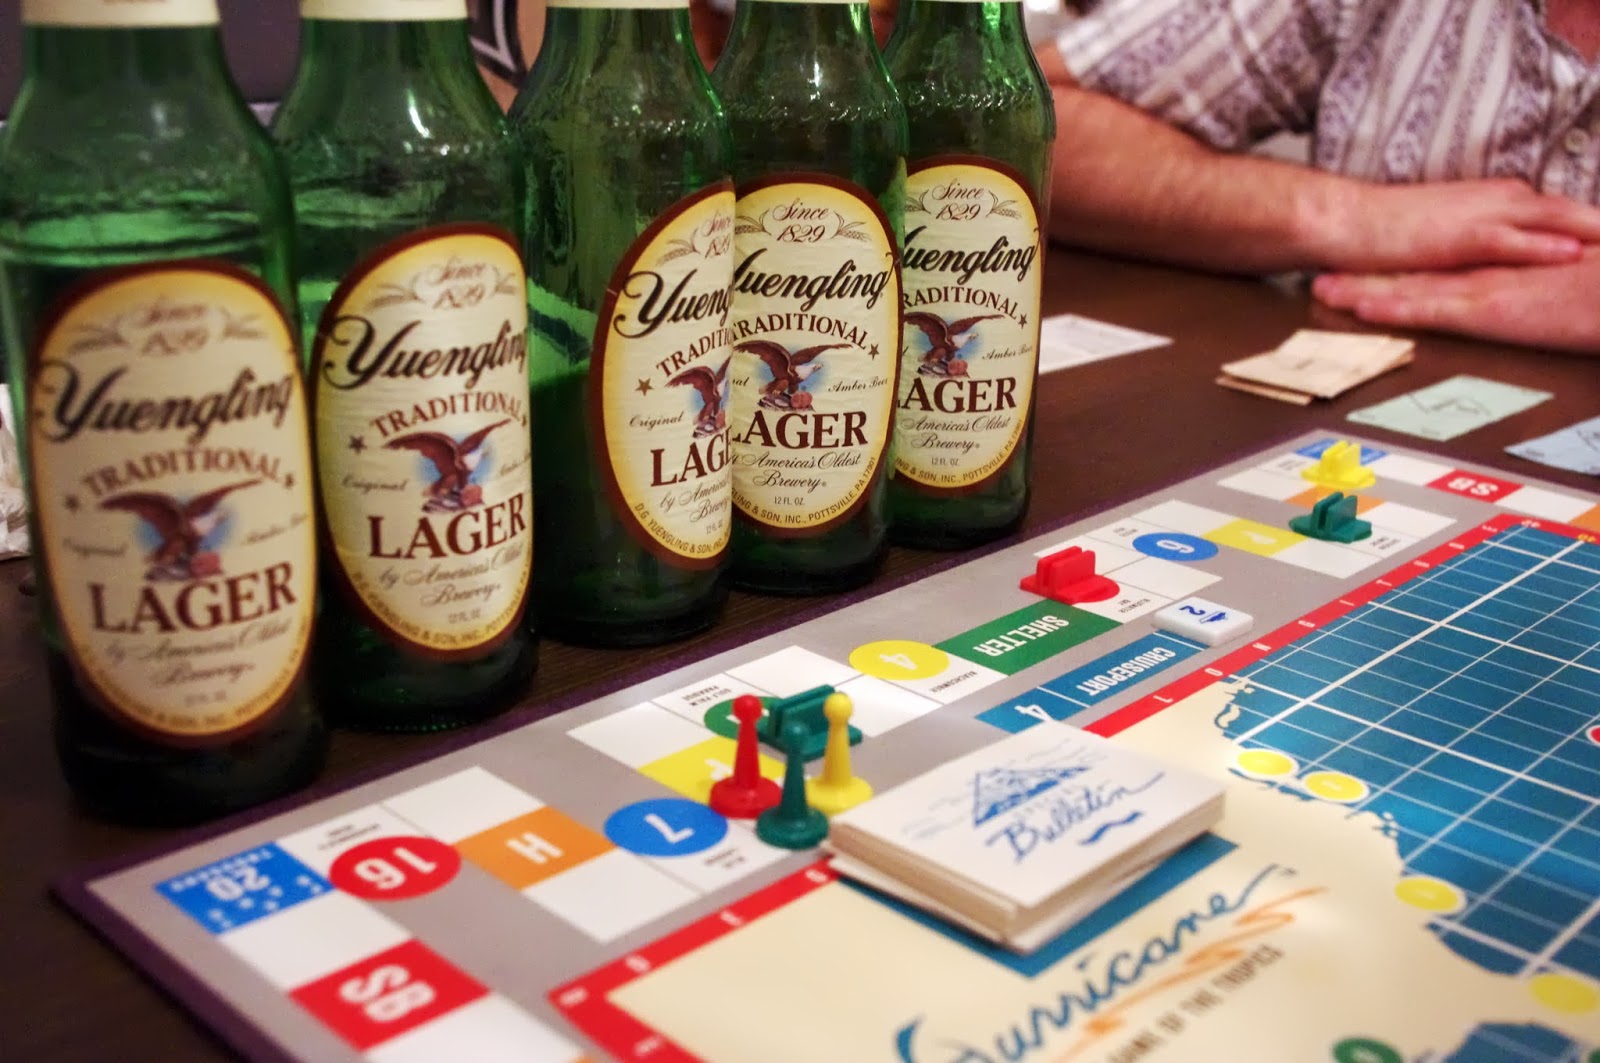
So, a basic rundown: up to 4 people can play at a time, and while that seems like a small group, it's probably best, since the rules are completely confusing. Each player is given a yacht and a pawn. The yachts start in a Cruise Port and the pawns start on...well...the START square of the board.


As you move around the board, you can purchase resorts for extremely reasonable prices - between $50,000 and $250,000. You can also buy hurricane preparedness options for your resorts, such as an evacuation plan, a seawall, and structure reinforcements. 


If you land on a resort that is owned by someone else, you have to put your yacht in the water and make your way toward the resort. This is a tedious process and one that we will probably rework the next time we play. Here is Michael, making his way toward the resort in New Orleans. (side note: Who in their right mind would buy a resort in New Orleans? I mean, really?)


I think Mom was trying to get to Cancun. I feel like this game might actually be improved by adding some drinking options to it as well.


Issues arise if your yacht is in the water and you are in the path of a hurricane. This was the slowest part of the game. The only time the hurricane moves is if a player lands on an "H" square. To see where the storm is going next, you use this very detailed card of coordinates and you go one line at a time. Most of the time, the hurricane would only move two coordinates in one direction, meaning it was slow going.


This is where we changed things up a bit. In addition to the "H" squares, there are also "P" squares on the board. The directions say that if a player lands on a "P", they have the chance to buy additional options for their resorts. In our version of the game, if you land on a "P", a Sharknado! is coming!!! This translates to the hurricane moving two times instead of one. It doesn't seem like much, but once we started doing that, the game really picked up.

We also edited some of the Special Bulletin cards. :-)


The Bermuda Triangle is just one of the obstacles you run into as you go around the board. The consequences of being in the Triangle are actually quite boring and will be changed when we rewrite the directions.


If you ever get the chance to play Hurricane! (I can't type it without the exclamation point, even if the actual game does not have that particular punctuation in the title), I would recommend that you have the following:
  • One sober person who is actually paying attention to the rules.
  • A sense of humor, because the game is quite ridiculous.
  • Beer. Lots and Lots of Beer.

The game makers had a Kickstarter to revamp the game, but they did not make their goal. Reading over some of the "improvements" I think I like the original version better. Not everything needs an app to make it more exciting.

Sunday, July 21, 2013

Leftover Makeover: Mashed Potato Pancakes

Generally speaking, mashed potatoes only make an appearance at our house on holidays. Thanksgiving, Christmas, New Years. Sometimes, they show up when we are having people over, but most of the time, I ask my mom to make them for gatherings. She just has a knack with the mashing and the flavoring that I haven't mastered.

My brother is in town for the week and we all hung out at Mom's house last night. And because she is The Best Mom In The History Of Moms, she made us mashed potatoes. One thing she always does is make enough so there are leftovers.

She was nice enough to send some home with us, so I decided to turn them into Mashed Potato Pancakes for lunch today.

This is seriously one of the easiest recipes to throw together, and the nice thing is, if you have company, they make a lovely addition to breakfast or brunch or dinner or lunch. The other nice thing is that you can make these with lots of different flavor additions - change the type of cheese, change the spices, and you can completely customize your pancakes. That's my favorite part of cooking: making it my own.


Ingredients:
  • 2 Cups Mashed Potatoes
  • 1 Egg, beaten
  • 1/2 Cup Mozzarella, shredded
  • 3 Tbsp. Cream Cheese, softened
  • 1 Tbsp. Fresh Chives, chopped
  • Salt and Pepper, to taste
  • 2 Tbsp. Olive Oil
In a medium size bowl, combine all ingredients except olive oil. Heat the oil in a skillet over medium heat.

Drop potato mixture by the spoonful into the heated skillet. Smoosh down with your fingers to flatten into pancakes.

Cook pancakes until browned, for about 3 to 4 minutes on each side.

Yield: 6 2" pancakes

You can serve these by themselves, or with sour cream and chives, or with a fried egg on top. The possibilities are endless.

Friday, July 12, 2013

DIY: Fabric Softener

You can't have homemade laundry soap without homemade fabric softener, can you? I don't think so.

I found this recipe through Pinterest - thanks to Kat's Custom Kreations for the ratios I used below.

Three ingredients are all you need:


  • 8 ounces Hair Conditioner (Cost = $0.40 since I found V05 on super sale at Wal-Mart)
  • 12 ounces White Vinegar (Cost = $0.24)
  • 24 ounces hot water (No Cost, since we have well water)
In a large mixing bowl, combine the hot water and conditioner. It will be foamy.


Add the vinegar and stir until combined. 

That's it. You end up with 44 ounces of fabric softener.


The total cost is $0.64. Each load of laundry uses 2 ounces of the liquid. This means the total cost per load is around $0.03. !!!

I haven't bought liquid fabric softener in a long time, but the last time I did, I bought Gain. Right now, you can get a 51 ounce bottle of Gain at Wal-Mart for $4.47. The bottle says it has enough for 60 loads. Using that as the calculation, that comes out to $0.08 a load. That is a $0.05 savings per load - might not seem like a lot, but I'll take what I can get.

I put it in a Downy ball, but you can also add it to your fabric softener compartment, if you have one on your washer.

As for the smell, it is lovely while in the bottle, but it does not leave much of a smell on the clothes. It does, however, make clothes incredibly soft, due to the vinegar.

Thursday, July 11, 2013

Stuffed Baked Tomatoes

This isn't really a recipe, as much as it is a "Hey, you should try this!" idea. I made Baked Shrimp and Grits a few nights ago. The recipe made a 9x13 pan of cheese grits, which is a lot, even for a transplanted Southern girl like me.

I decided that instead of just heating up the grits and enjoying their cheesy goodness, I should turn them into something even better. And this...this, my friends, is the way to go.


Basically, you take some cheese grits (mine already had a lot of spices added, including Louisiana Hot Sauce) and mix in some green onions, plus a little more black pepper and garlic. Then, you hollow out some tomatoes - bonus points if they are homegrown, because that just adds to the awesomeness of the dish. Mix the tomato guts with the grits mixture.

Stuff those pretty red guys with the cheesy grits mixture and bake them in a 350 degree oven for about 30 minutes. The grits get all melty and the tomato flavor becomes intensified. You could probably sprinkle some cheddar cheese on top toward the end of the baking time, if you wanted to go a little nuts. I am adding this to my regular rotation of recipes to impress guests, because they look fancy, but are so easy to make.

Monday, July 8, 2013

DIY: Laundry Soap

Being unemployed surprisingly has its perks. One of those is having the time to do the things I've always said I wanted to do. An example is making my own household cleaners. I hate using chemicals to clean for a few reasons. I have a very sensitive nose, so even the smallest amount of bleach can send me running for the Kleenex. Also, we live in a cabin in the woods, and we have well water - anything that gets put into our sinks or toilets or bathtubs or washer basically goes right back into our water supply. The more I can do to reduce the amount of chemicals we are exposed to, the better.

The first DIY cleaner I wanted to make was laundry soap. I normally buy the dye-free, scent-free version of whatever brand is on sale, so I wanted to stick pretty close to that. I put an all-call out on Facebook to my other DIY-ing friends, to see if anyone had made laundry soap and what kind of bar soap they had used.

My friend Marissa, domestic goddess and all-around amazing person, gave me her recipe for powdered laundry soap. It even included a cost breakdown, comparing the homemade version to Tide. In her recipe, she uses OxyClean and Purex Crystals. Since I wanted to stay as close to scent free as possible, I left those two ingredients out. Here's what I used to make the powdered goodness:


  • 38 ounces of Borax (Cost = $1.52)
  • 27.5 ounces of Arm & Hammer Super Washing Soda (Cost = $1.65)
  • 32 ounces of Baking Soda (Cost = $1.28)
  • 2.75 ounces of Fels-Naptha Laundry Bar, grated ($0.50)
(Note: Since this was my first batch of soap, I didn't want to commit to a full recipe, so I halved Marissa's original ingredients. All measurements above are half of the regular size boxes/bar and all were purchased at Wal-Mart.)


Mix all ingredients together in a large bowl. Store in a lidded container.


The total cost of a half batch is $4.95. Each load of laundry uses 1 ounce (2 Tablespoons) of the powder. This equals a cost of $0.05 per load. According to Marissa's calculations, the average cost of one load of laundry done using Tide is $0.27 per load. Granted, there are only two people in my house, but I do a LOT of laundry. At a $0.22 per load savings, I think I'll continue to make my own soap.

I've already done about 6 loads using this mixture and I like it. A lot. The clothes smell clean and they look clean, too.

One word of warning: if in your brain, Soap Suds = Clean, you need to know that this mixture does not make any suds. Let me assure you, this is OK. Seriously.

ETA: Marissa wanted me to point out that the original recipe for this soap comes from http://www.howdoesshe.com/cheaper-and-better-diy-laundry-detergent/. Give credit where credit is due. :-)

Friday, July 5, 2013

Dehydrator Madness: Dried Cantaloupe

I have been so blessed this summer with fruit and vegetables from local farms that have an overabundance that they just can't sell. Blueberries, grapes, cucumbers, watermelon and cantaloupe.


I hate to see food go to waste, especially when the food is as ripe and sweet as these cantaloupes were. I turned one of them into popsicles (are you noticing a trend?), but wasn't sure what to do with the second.
 
 
Enter the Food Dehydrator.
 
Dried Cantaloupe? Would it work? Would it just shrivel up and be totally gross? It was worth giving it a try. I sliced the melon into 1/4" thick slices and placed them on the dehydrator trays.


I set the dehydrator at 135 degrees and let it go for 8 hours. The result?


It is very similar to dried mango, but with a slightly earthier flavor. It would make an excellent addition to trail mix, and also to the Hurricane Kit, but to be honest, I haven't eaten much of it on its own. This is one of those foods that I could see making again if I had too many cantaloupes and no desire to eat them right away.


Wednesday, July 3, 2013

Cucumber Lime Mint Popsicles

It is officially summertime. You can tell, because every single day this week, it has rained. And not just rained, but dumped buckets on our yard. This generally lasts for about 10 minutes and then, back to that famous Florida sunshine. That's the thing about Florida in the summertime - if you don't like the weather, just wait 10 minutes and it will change.

In addition to the daily rainstorms, it has also been hot. Sweltering is probably a better way to describe it, actually. Temperatures in the 90s, sometimes breaking 100, are not unusual, but combined with the humidity, it makes for a steamy atmosphere. Steamy, not in a sexy way, but in a shirt stuck to your back, hair the size of a Texas beauty queen, kind of way.

When it gets like this, there is only one thing to do: Make popsicles. I've gone through a popsicle making phase over the past few weeks, combining mostly traditional ingredients like fruit, yogurt, and simple syrup, but I wanted something different.


Cucumber Water has always been something that in my head, I know I love, but I never actually make it at home. We had an over abundance of cucumbers, thanks to a farmer friend with a bumper crop. With those cucumbers, we made pickles until the entire house, and my skin, smelled like pickle juice for days. I infused some vodka with cucumbers. And of course, we ate cucumbers sprinkled with sea salt and pepper for lunch and dinner, and sometimes breakfast.

In the haze of the heat, I became obsessed with the idea of making popsicles out of cucumbers. The idea to just shove a stick up the end of a peeled cucumber and pop it into the freezer might have crossed my mind, but I wanted other flavors in there, too. I know that Cucumber Mint salad can be simply heavenly, and I know that when you combine mint and lime, you basically get a Mojito. So I put all three into a blender and the result: refreshing, light, crisp. Lovely.


Cucumber Mint Lime Popsicles
Ingredients:
  • 2 Cup diced cucumber (approx. 3 small cucumbers, that have been peeled and seeded)
  • 2 Tbsp. fresh lime juice (one medium lime)
  • 3/4 Cup Mint Syrup - recipe below
Place all ingredients in to a blender. Puree until smooth. Pour into popsicle molds. Let freeze for 1 hour, then insert popsicle sticks. Continue to freeze for an additional 3 - 4 hours.

Yield: 6 Popsicles

Mint Syrup
Ingredients:
  • 1 Cup Water
  • 1/2 Cup Sugar
  • 1 Tbsp. fresh Mint Leaves, roughly chopped
Combine water and sugar in a saucepan. Heat over medium heat, until sugar dissolves. Add chopped mint leaves and bring to a boil. Boil for 1 minute. Set aside to cool.


Before adding syrup to the blender, strain to remove mint leaves.